To add a patient from your Dashboard, follow the steps below:
| · | Click the  Plus button on the top right of your Dashboard. The Add Patient dialog box displays. Plus button on the top right of your Dashboard. The Add Patient dialog box displays. |
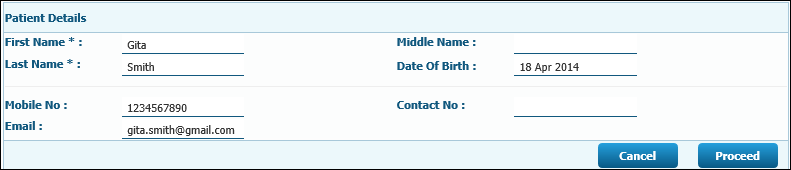
| · | Type the first name of the patient in the First Name field. (Mandatory field) |
| · | Type the middle name of the patient in the Middle Name field. (Not mandatory) |
| · | Type the last name of the patient in the Last Name field. (Mandatory field) |
| · | Click the Date of Birth field to access the drop-down calendar. Select the date of birth of the patient from the calendar. |
| · | Type the mobile number of the patient in the Mobile No. field. |
| · | Type the contact telephone number of the patient in the Contact No. field. |
| · | Type the email id of the patient in the Email field. Click the Cancel button to cancel the operation. |
| · | Click Proceed. The confirmation dialog box displays. The patient is allotted an IOHID. |
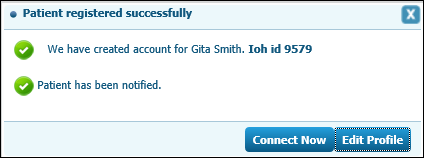
| · | The patient is notified by email if an email id is provided. |
| · | Click the Cancel button to cancel the operation. |
| · | Click the Connect Now button to start a consultation with the patient. |
| · | Click Edit Profile button to edit the profile of the patient. |
Access Dashboard Consultation
Dashboard Upcoming Appointments
Quick Prescription
Start Consultation
Create/Save Electronic Records
End Consultation
Create/Save Receipt


